Completing the iPad Loan Agreement Guide
Use the Google “Translate” link at the top of the window to translate the following directions to the desired language.
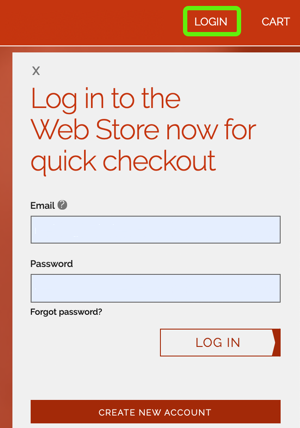
1. If you have already made a RevTrak Web Store account, please log in with your email and password. –OR– If you haven’t yet created an account, please create a new account using the “CREATE NEW ACCOUNT” button and complete the requested information. The “Log in” window is always available by selecting “LOGIN” from the top navigation bar.
2. Select the button for either Elementary Schools, Middle Schools, or High School.

3. Locate the desired school from one of the Elementary, Middle Schools, or High School screens and select the “iPad Loan Agreement” button for the same school your child attends.
If you have more than one child, you will need to come back to the school level selected in step #2 above, to select the correct school for each one of your children. The three different school levels look like those below.

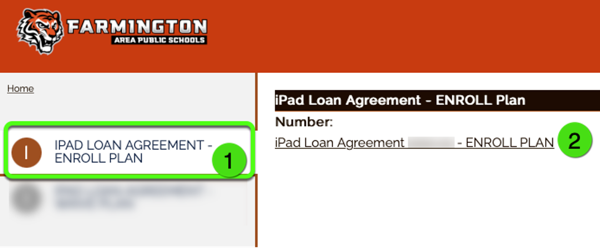
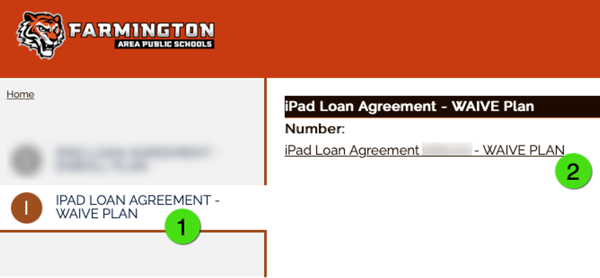
4. Select One of the iPad Loan Agreement Options. There are two different options in the left side bar. Select the choice on the left and then the “iPad Loan Agreement” link on the right side.
iPAD LOAN AGREEMENT - ENROLL PLAN allows one to agree to the iPad Loan Agreement and opt to enroll in the iPad Protection Plan. The iPad Protection Plan is $35/student for the next academic year (no additional cost for coverage during the summer months) or IF one is receiving Educational Benefits (Free/Reduced lunch program) the enrollment cost is $0.00).
-OR-
iPAD LOAN AGREEMENT - WAIVE PLAN allows one to agree to the iPad Loan Agreement and elect to waive participation in the iPad Protection Plan. There is no fee with this option.
5. CLICK HERE to Register for this Class. Check the activity and name of your child’s school. Select “CLICK HERE to Register for this Class.”

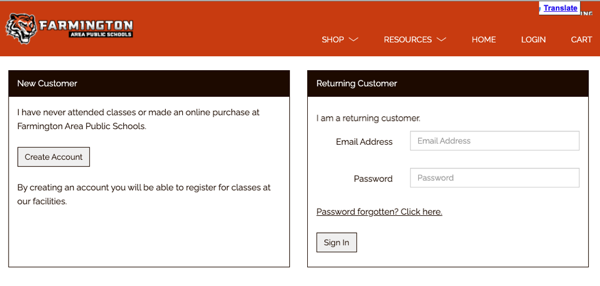
6. IF you didn’t already log in as in Step #1, you will be prompted to log in or create an account and sign in. IF you have not created a RevTrak account, select the “Create Account” button and complete the needed information. IF you have already created an account, please log back in with your email and password and select the “Sign In” button.
7. “Who are you registering?” Please make sure to select the name of your student (other) and do not select yourself (self). If your student is not yet added to your account, use the “A New Person” button and complete the required information. Please capitalize the first letter of the first name and first letter of the last name (Not all caps or all lower case). The account name should be the student’s official first and last name as we have it in our student information system, Infinite Campus.
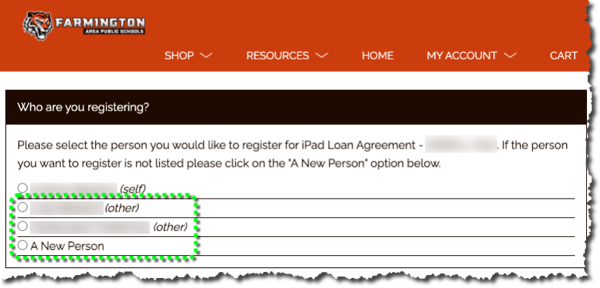
8. Confirm the child being registered. Make sure the blue dot is next to your child’s name. It should have “(other)” next to the name and not “(self)”. Check that the information is correct. Select “Continue.”
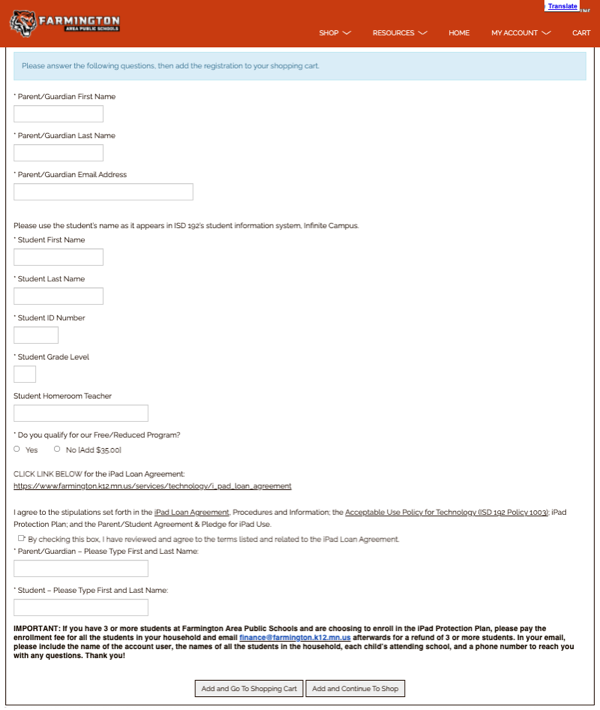
9. Complete the required Questions. Please check the spelling and use capital letters when appropriate. Do not include extra spaces. The Student ID, Student First Name and Last Name must be an exact match the names we have in Infinite Campus.
10. Add to Cart. If you are done with your child or children, select the “Add and Go To Shopping Cart” button. If you have to sign the iPad Loan Agreement for additional children, select the “Add and Continue To Shop” button.

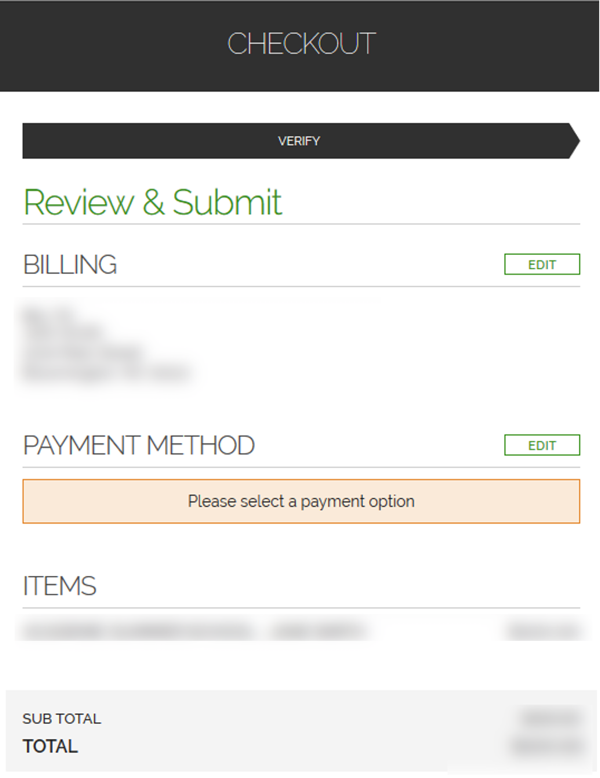
11. Check Out. Within the Checkout screen, you can verify your billing address and Select a Payment Option (if needed), before selecting “Place Order.” When you click “Place Order,” your payment will be processed, and a receipt will appear. Your receipt will also be emailed to the address you listed when making your account.
12. Sign Out. When finished registering, you may click on the district logo or “HOME” button in the top navigation bar to return to the main page. Select “Logout” from under “My Account”.
